How to Make a Minecraft Server (Step-By-Step Guide)

Last Updated on April 11, 2024 by James Wilson
Minecraft is still going strong one decade after release. The sandbox lego-like game allows users to create infinite worlds and play in them. You can buy the Minecraft game via their main website for both PC and Mac. There are two ways to play Minecraft – Creative Mode, which I personally like and Survival Mode.
The cool thing about Minecraft is that there is no one way to play the game and you can create worlds with their own rules and have your friends join in.The word Minecraft nicely sums up the game, as you “mine” for the materials to then “craft” objects in your world. As well as being the second most popular video game, Minecraft is a great tool for teaching kids. There is a global community of creators, and kids can learn anything from art and language to geography and coding through Minecraft.
If you’re new to Minecraft the easiest way to get playing fast is to buy the game and play it, simple right?! If you want to create your world and don’t want to go to the hassle of setting up a server, then you can do so in the “Minecraft Realms” section. Setting up your own Minecraft server gives you the ability to create larger worlds and even host it on your domain name.
In this article, we’ll explore various ways to set up your Minecraft server, no matter how you want to use it, for example via your PC, public, with friends, multiplayer, offline or for free.
Is Minecraft Free?
You can get a demo, lite or modded version of Minecraft for free. However, normally you buy the Java version from the official Minecraft website.
One way to play for free is by joining in with another Minecraft game – for example, if your friend has a Minecraft server, they’ll normally be able to add you as a user. Minehut offers Minecraft hosting and allows people to add up to 10 users with a free account. We’ll discuss setting up a server in Minehut below.
Can You Play Minecraft Offline?
Yes, you can play Minecraft offline by selecting the “play offline” in your Minecraft launcher.
Minecraft works on just about every device
Desktops – Windows, Mac, Linux and Windows 10
Consoles – Xbox One, Xbox 360, PlayStation 4, PlayStation 3, PlayStation Vita, Wii U, Switch and New 3DS
Devices – iOS, Android, Kindle Fire, Gear VR, and Fire TV
Can You Make a Minecraft Server for Free?
YES! How awesome is that? You can make a Minecraft server in many different ways – for example on your PC or a free server. Minehut offers FREE Minecraft unlimited hosting for the Minecraft Community via their cloud servers. What’s more, you can have up to 10 players on your Minehut server. If you want to add more users, then you can buy credits directly from Minehut.
Minehut currently powers 787,532 Minecraft servers. They also offer DDoS Protection and a selection of cool plugins to customize your server. Minehut also comes with a supportive community forum where you can find answers to your questions or get involved with other players.
How to Make a Minecraft Server for Free
Here is a step-by-step guide to creating your FREE Minecraft server with Minehut – in just seven steps. This guide is specifically for people who are using Java or Pocket Editions of Minecraft. The Pocket Edition is a good choice if you want to use your server via your smartphone.
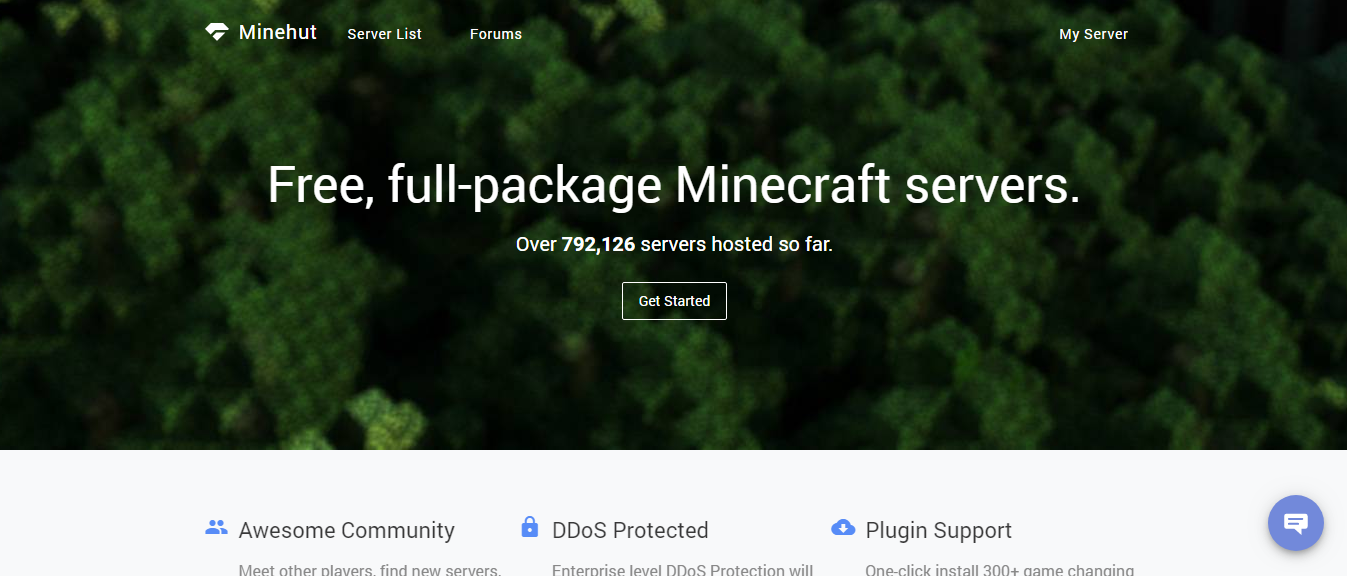
Step 1 – Visit Minehut and create an account. By hitting the “Get Started” button in the middle of the screen.
Step 2 – Verify your email address by cutting and pasting the code that they’ll send you to your inbox (check your spam folder if you don’t receive an email from them)
Step 3 – Login and create a server name. Keep it short and sweet, you’re only allowed to use 10 characters (numbers or letters)
Step 4 – Pick your server type by selecting it from the dropdown. Select Java or Pocket Edition
IMPORTANT NOTE – The Pocket Edition option is not always available
Step 5 – Hit the “Create” button to create your server
Step 6 – Refresh your page and then go to the dashboard tab. You’ll find the dashboard dab on the top left-hand side of the page.
Step 7 – Hit the blue “Activate Server” button.
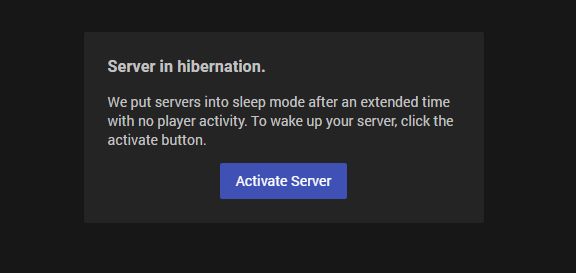
Congratulations! You’ve successfully set up your free Minecraft server with Minehut.
PRO TIP: You can go over and join the chat in Discord by clicking on the chat icon in the bottom right of the screen.
Your Dashboard will look a little something like this:
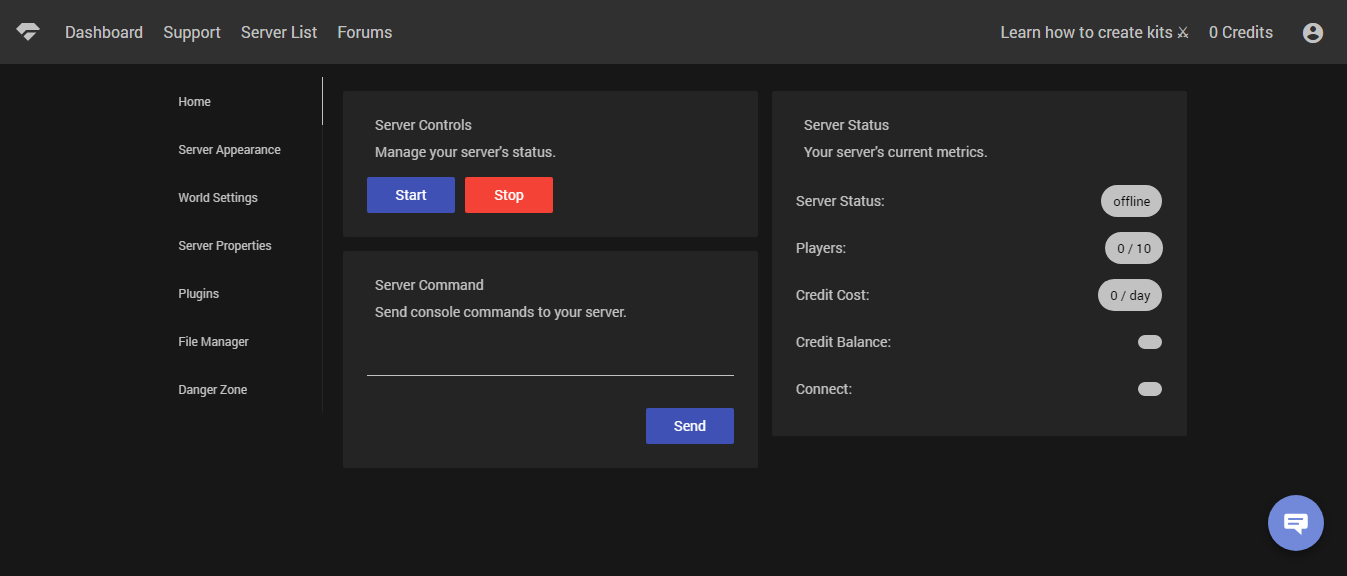
Once you have set up your server, you’ll want to go into the settings section to configure it to your liking. Firstly you’ll want to grab your server’s address. To get your server’s address go over to the server status section at the right of your page. Your address should be next to the “Connect” title. Make sure you save your server address for future use and to share with friends. Here are some server settings that you can configure to make your server your own.
Changing the look and feel of your server
You can adjust your server’s appearance in Minehut by clicking on the “Server Appearance” tab. You’ll find it on the left of the page, and then you can change the following:
- Server Domain — you can change your domain name – to whatever you prefer. You’ll be using this domain name to connect to your server, and so that other people can connect too – so make it something catchy. This is the name that people will see if you make your server publicly listed.
- Server MOTD — in this section you can write a short description of your server and your plans for it.
- Server Visibility — this section is important as it allows you to select a public server or an unlisted one. Unlisted makes your server private and only accessible via the link that you’d need to send to your friends. A publicly listed server will be shown so that other people can join in. So it just depends on how you want to play.
- 4. Server properties – Select “Server Properties” – then click a category tab and then selecting your preferred options – you can enable or disable server properties here.
- World settings – Hit “World Settings” to review the current settings. If you want to add a custom world seed you can do this by altering the text in the “World Seed” section. Save will save your settings and “Reset World” will cancel your new settings.
PRO TIP: You can upload and save files in the “File Manager” section. However, it’s important to understand exactly what each file does before getting involved with the file manager section.
Alright, now your server is all set up and customized to your liking, it is time to connect and get creating.
How to Connect to Your Minecraft Server on Minehut
When connecting to your new Minehut server, keep your dashboard open so that you can adjust anything quickly. Then follow the following steps to connect to your server:
Step 1 – Double-tap on the Minecraft icon to open Minecraft and select PLAY at the bottom of the screen.
Step 2 – Tap on Multiplayer
Step 3 – Select “Direct Connect” on the bottom right of the screen.
Step 4 – Enter your server address (you should have saved it in the setup process above).
Step 5 – Tap “Join Server” at the bottom of the screen
Awesome! You’re all set.
PRO TIP: If you are having difficulty connecting to your Minehut server leave it for a while before getting started. If the issue persists then remove any unnecessary plugins as they can interfere with how your server functions.
How Do You Make a Multiplayer Server in Minecraft?
You can make a multiplayer server in Minecraft for up to 10 players for free using Minehut. If you want to add on more players then that will come at a small fee. If you have followed the steps above and created your free Minehut server, then you can add more players by clicking on “Server properties”, on the left of your page. Then select “Max Players” – you can add up to 75 players.
Below you’ll find the current prices to add people onto your server.
- 10 (Free)
- 15 (30 credits/day)
- 25 (50 credits/day)
- 35 (75 credits/day)
- 42 (110 credits/day)
- 50 (135 credits/day)
- 60 (170 credits/day)
- 75 (210 credits/day)
Is Minecraft Educational/ Good For Kids?
Minecraft has a new “Education Edition” that is meant for use in school classrooms. Playing Minecraft offers an opportunity to learn in a fun environment. Students get to work on their creative abilities and mathematics while playing.
There is a world of resources available to educators who wish to use Minecraft in the classroom, for example, entire lesson plans for Pixel art and grid paper to get creative. The lesson plans are organized by age and subject. You can learn Language and arts by playing “Finding Treasure” or Geography and social good by playing “Humans and Elephants”.
Make a Minecraft Server on Your PC in 5 Steps
You can easily make a Minecraft server on your Windows, Mac, or Linux computer at home if you have some technical know-how. Here is a 100ft view of what you’ll need to do:-
- Install Java
- Install Minecraft server software
- Configure your PC server & network
- Start PC server
- Check that you can access your server
IMPORTANT: You’ll need to be fairly tech-savvy to be able to create a Minecraft server.
What You Need to Set Up a PC Based Minecraft Server
Before you get started it’s important to check that your PC is up to the task. While you don’t need to pay a fortune for your Minecraft server – most basic laptops won’t do the job. You’ll need a decent desktop PC, preferably not the same computer that you plan to play Minecraft on (if possible).
It’s also a good idea to connect your Minecraft PC based server directly to the internet using an Ethernet cable, rather than using wireless. The wired internet is still more reliable and powerful than wireless.
Home Server vs Externally Hosted Server
There are a few pros and cons that you should know about before deciding to create a server from home. Here are a few pros and cons to getting started with:
Pros
You are in complete control
Get started straight away
Cheap and easy way to host Minecraft
Allow as many people as you like to join your world
Cons
Your home network will be exposed publicly
Somewhat of a security risk
Very technical
Using a Hosting Provider to Host Minecraft
If you choose a hosting provider for your Minecraft server then you’ll need to choose a Virtual Private Server (VPS) or dedicated server. Shared hosting is not up to the task. This is a more costly option however you could get your friends to help pay for the monthly fee that you’ll incur.
Without further ado, let’s dive into how to set up your Minecraft server on your PC. Firstly, we’ll start with a Windows PC…
How to Make a Minecraft server with a Windows PC
- Check that you’re using the latest version of Java
If you have a very old PC then you probably don’t need to check and you can go straight to Java and download the latest version of Java.
To check what version your PC is using the latest version of Java go to your windows control panel. You can access it by selecting the windows icon on the far bottom left of your screen. The windows icon looks something like this:
Open a command prompt and then type in java – version and then you should be presented with the Java version number that you are currently using. The latest version at the time of writing this article is “Java SE 8”.
Compare this against the latest Java version on the official Java website. If yours is out of date then download the latest version of Java onto the PC that you are going to use as a server.
How to Open a Command Prompt in Windows
Using the command prompt makes me feel like a real coder. It’s basically how the computer works behind Windows – the old Disk Operating System (DOS) system.
Use the Windows key and X key to open the command prompt. Select command prompt on menu

Et. Voila! The command prompt should magically appear on your screen.
- Create a dedicated folder for your Minecraft server files.
Create a dedicated folder on your PC for you to run your Minecraft server. Store the folder in a place that you’ll remember – I’d advise your programs folder or desktop.
- Download Minecraft server software
Visit the official Minecraft website and download the server software. It’s the same one no matter whether you’re using a Mac or Windows OS.
The software comes as a Java .jar file that you should save in your dedicated Minecraft folder.
Once downloaded, locate the .jar file and double click to open. This will create configuration files that you’ll need to modify.
IMPORTANT: Next you’ll need to accept the End-user license agreement (EULA). This step is required before using your Minecraft server.
To accept the EULA open the text file that should be located inside your Minecraft folder called “eula.txt”. Then change the text on the document from eula=false to eula=true.
- Public Servers/ Multiplayer Servers
If you want to share your Minecraft server with the world, so that other people outside your home can play with you then you’ll need to enable port forwarding on your server.
PRO TIP: Only enable port forwarding if you are ok with the security risk. Otherwise, you can still use your Minecraft server locally.
Find out more about port forwarding here
Each router has its instructions on how to configure port forwarding, so look out the instruction manual for the router side. On the Minecraft side, you’ll need to forward TCP port 25565.
Open another command prompt to find out the local IP address of your server (PC) and type ipconfig in the prompt.
- Starting your Minecraft Server
Step 1 – Open a new Windows command prompt.
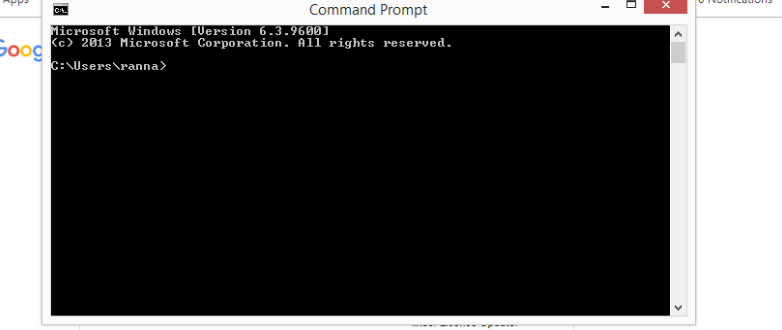
Step 2– Under the Microsoft logo and info you should see C:\Users\yourpcname> where “yourpcname” is replaced for the actual name of your PC. My PC is called Ranna, as you can see in the screenshot above. Type in cd and the location of your server file. If you saved it in your desktop folder then you can find it by typing cd desktop. Find your Minecraft server.
Step 3 – Start your server using the following command:
[code type="bash"]

java -Xmx1024M -Xms1024M -jar {server file name} nogui
Replace {server file name} with your server file name.

[/code]
Inviting people over to your new Minecraft World
Once you’ve set everything up you can invite people to connect with your server via your public IP, or if you are playing with people in your home you can use your local IP address. To find your public IP address simply type “my IP address” into Google.
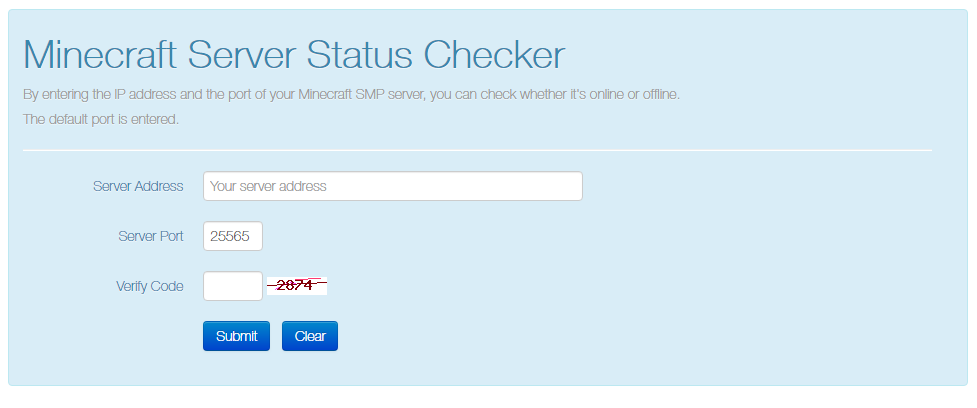
Minecraft Server Status Checker
You can check if your Minecraft server is online or offline by pasting your server address into this free Minecraft Server checker service. This will work for any type of public Minecraft server.
How to Make a Minecraft server on a Mac
- Check if you have Java installed
If you have a new Mac then you’ll probably have Java pre-installed and you’ll be good to go. However, if you have an old Mac machine then you’ll need to go to the official Apple website and download the legacy version of Java.
- Create a dedicated folder for your Minecraft server files.
Create a dedicated folder on your Mac to run your Minecraft server. Store the folder in a place that you’ll remember – I’d advise your programs folder or desktop.
- Download Minecraft server software
Visit the official Minecraft website and download the server software. It’s the same software for both Windows and Mac OS.
The software comes as a Java .jar file that you should save in your dedicated Minecraft folder.
Once downloaded, locate the .jar file and double click to open. This will create configuration files that you’ll need to modify.
- Open TextEdit
Open TextEdit (Mac’s version of Notepad).
Hit “format” and set it to plain text. Copy and paste the following:
[code type="bash"]

#!/bin/bash

cd "$(dirname "$0")"

exec java -Xms1G -Xmx1G -jar {server file name} nogui

[/code]
(Replace {server file name} with your server file name.)
Name the file start.command and save it in your dedicated Minecraft folder.
- Run start. command File
To run the start.command file then you need to open a new terminal. Type the following
chmod a+x
Leave a space after the above command and then drag your start.command file into the terminal window. Hit “Enter”.
What is a MacOS Terminal?
Terminal is the Macs’ version of command prompt. It opens the DOS screen. Use “Control + Option + Shift + T” open a new terminal window.
- Public Servers/ Multiplayer Servers
If you want to share your Minecraft server with the world, so that other people outside your home can play with you then you’ll need to enable port forwarding on your server.
PRO TIP: Only enable port forwarding if you are ok with the security risk. Otherwise, you can still use your Minecraft server locally.
Find out more about port forwarding here
Each router has its instructions on how to configure port forwarding, so look out the instruction manual for the router side of port forwarding. On the Minecraft side, you’ll need to forward TCP port 25565.
Open another terminal to find out the local IP address of your server (PC) and type ipconfig in the prompt.
You’ll also need to enter your server’s local IP address as the Output IP or Server IP for the forwarded port. This tells the router which device to point at. To find your server’s local IP, open the Terminal and enter ifconfig.
- Starting your Minecraft Server
Step 1 – Double-tap the “start.command” file in your dedicated Minecraft folder. A new terminal window should then open. If there are errors, that’s quite normal at this stage.
Step 2 – Under the Microsoft logo and info you should see C:\Users\yourpcname> where “yourpcname” is replaced for the actual name of your PC. Type in cd and the location of your server file. If you saved it in your desktop folder then you can find it by typing cd desktop. Find your Minecraft server.
Step 3 – Start your server using the following command:
[code type="bash"]

java -Xmx1024M -Xms1024M -jar {server file name} nogui

Replace {server file name} with your server file name.

[/code]
Inviting people over to your new Minecraft World
Once you’ve set everything up you can invite people to connect with your server via your public IP or if you are playing with people in your home you can use your local IP address. To find your public IP address simply type “my IP address” into Google.
Check That Minecraft Server is Working
You can check if your Minecraft server is online or offline by pasting your server address into this free Minecraft Server checker service. This will work for any type of public Minecraft server.
Make a Minecraft Server With Linux hosting Provider
The security risks that are involved in setting up a public Minecraft server might leave you feeling a bit uneasy. But don’t fret – you can always set up your Minecraft server with an external host such as 1&1 IONOS or Hostinger. We’d suggest using a VPS at first unless you are looking to host the game with a lot of players, then a dedicated server would be your best option.
PRO TIP: Setting up a Minecraft server with a host is quite technical. The easiest way to set a Minecraft server up is with Minehut. However, if you’re confident that you understand server environments, then using a Linux hosting provider is a great idea.
Pros
Your Local network is secure
You don’t have to manage the hardware
Added security features
Scale your server up as you need more space
Have as many users as you want
Cons
Can be costly
Need to be fairly experienced
- Connect to your host with SSH
You’ll need to enable and connect to your web hosting account with SSH (Secure Shell). To do this you’ll need to know the following information:
Your Host (domain name or IP), Username (your primary FTP username), Password (your primary FTP password) and use Port 22.
You’ll require an SSH client to connect. We recommend:
- Install Java in 6 Steps
Step 1– Now that you are connected to your host via SSH as the root user enter:
apt-cache search openjdk
You should now see a list of OpenJDK packages that can install Java.
Step 2 – Select openjdk-7-jdk – the OpenJDK 7 Development Kit.
Step 3 – Enter the following:
apt-get update
Step 4 – Install Then openjdk-7-jdk by entering:
apt-get install openjdk-7-jdk
Step 5 – Wait for prompt then press “Y” to authorize the installation.
Step 6 – To check that Java has been successfully installed enter
java -version
This should let you know that Java has been installed and the version that you’ve installed.
3. Create a Directory For Your Minecraft Server Files
Your Minecraft files will be stored in a directory on your server. Create this directory and then switch to that directory.
mkdir minecraft
cd minecraft
4. Download Minecraft server files
Run the wget command in your Minecraft directory to download Minecraft server files
wget -O minecraft_server.jar
5. Install & run “screen”
Installing and running “screen” will allow your server to run when you are not connected. This is particularly important if you have lots of players and you want your server to support. To install and run screen use the following command:
yum install screen
screen
6. Run & Check Your Minecraft Server
java -Xmx512M -Xms560M -jar minecraft_server.jar nogui
PRO TIP: To change the amount of space you are using for your Minecraft server change the “Xmx and –Xms” settings. Make sure that you have enough space and change 560M for 2G to change your allocated space up to 2 Gb of RAM
Check your server is running with the following command:
[code type="bash"]

stop

Edit the “server.properties” file and enter:

enable-query=true

[/code]
Then save and restart your server.
Check if your server is running on the free Minecraft Server checker service.
7. Give Your Server a Cool Domain Name
If you want to go the extra mile and create a cool new domain name to point to your server that is possible with your hosting provider. To do this you’ll need to purchase a domain name and point the DNS records to your server.
In Conclusion
As you can see, there are many ways to set up your Minecraft server. Minehut is the easiest for complete beginners but is restricted to 10 players. Setting up a Mincraft server from home is great, but it has some security issues. If you want to set up a domain name and have your Minecraft server with a host, then you can do that with a VPS or dedicated server.