How to Use BlueHost to Install WordPress

Last Updated on November 27, 2021 by James Wilson
The purpose of this article is to guide you through the step-by-step process on how to install WordPress with BlueHost.
If like many, you’ve made the decision to use WordPress.org, which is a self-hosted solution, I highly recommend using BlueHost for your web hosting. Read our full Bluehost review for in-depth analysis on why they are recommended.
BlueHost is a reliable and powerful web host that offers affordable pricing plans. Though we won’t go into their plans in too much detail, I will tell you that all their plans include 1-click WordPress installations.
This means it is literally that easy to install WordPress. It’s one of the many reasons we’ve chosen to use this method to get your website up and running.
BlueHost is one of the few web hosts that is recommended by WordPress themselves. Although it may seem a little confusing to use WordPress.org, I’ll show you each and every step along the way to make your life easier.
1: Go to BlueHost.com
The first step on our journey is to visit bluehost.com where you’ll find exclusive UKWebHostReview discounts to get you started.
Once you’ve gone through to BlueHost using the link I provided you with, you’ll find the “Get Started” button. This will take you through to BlueHost’s pricing plans which start from just £2.23 per month.

BlueHost’s special introductory offer is £2.23 per month for an initial term of 36 months. If you’re not happy with your hosting for any reason, they offer a 30-day money-back guarantee.
Alongside this, they also provide 24/7 support via live chat and telephone. WordPress is made easy by using BlueHost, so let’s get started.
Visit BlueHost.com (£2.43/Month)
2: Choose your hosting plan
Now you’ll need to choose a hosting plan to suit your needs. BlueHost has 4 pricing plans up for grabs.
| Basic | Plus | Choice Plus | Pro | |
| Websites | 1 | Unlimited | Unlimited | Unlimited |
| Storage | 50GB SSD | Unmetered | Unmetered | Unmetered |
| Bandwidth | Unmetered | Unmetered | Unmetered | Unmetered |
| Free SSL | ✔ | ✔ | ✔ | ✔ |
| Performance | Standard | Standard | Standard | High |
| Domains | 1 | Unlimited | Unlimited | Unlimited |
| Parked Domains | 5 | Unlimited | Unlimited | Unlimited |
| Sub Domains | 25 | Unlimited | Unlimited | Unlimited |
| Spam Experts | ✖ | ✔ | ✔ | ✔ (x2) |
| Office 365 Mailbox (30 days free) | ✖ | ✔ | ✔ | ✔ |
| Domain Privacy + Protection | ✖ | ✖ | ✔ | ✔ |
| Site Backup | ✖ | ✖ | ✔ | ✔ |
| Dedicated IP | ✖ | ✖ | ✖ | ✔ |
| Price | £2.23/mo | £4.13/mo | £4.13/mo | £10.56/mo |
Whilst I can’t tell you which hosting plan to choose, I can give you some advice. If you’re just starting out and this is your first website, their Basic plan will provide more than enough power.
Currently, the Plus and Choice Plus plans are the same price at just £4.13 per month. If you require unlimited storage, domain privacy, and SiteBackup Pro, the Choice Plus plan is highly recommended.
3: Choose your domain
Now that you’ve chosen your web hosting plan, it’s time to choose or use your existing domain name. This step looks as follows:
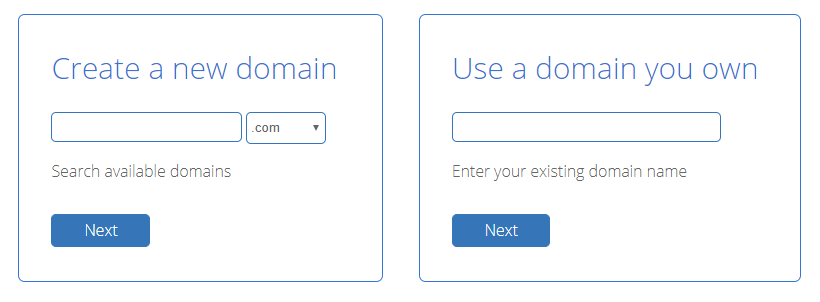
If you already have an existing domain with another hosting provider or domain registrar, you can simply enter it in the “Use a domain you own” box, then click next.
If you want to create a new domain name, simply enter your desired name into the “Create a new domain” box and choose your TLD (this is the .com, .co.uk, or other extension parts).
BlueHost will search to see if your domain name is available. If it is, you can proceed to the next steps, otherwise, they will suggest some alternative names you can use.
4: Register your account
Next up, you’ll need to register your account. You can sign in with Google to make this step easier, or you can fill out your account information.
Once your account information has been completed, check the package information is correct. You can change the length of your plan by clicking the “Account plan” drop down box. Bear in mind though, the exclusive discounts shown are valid for 36-month plans – this is the cheapest option.
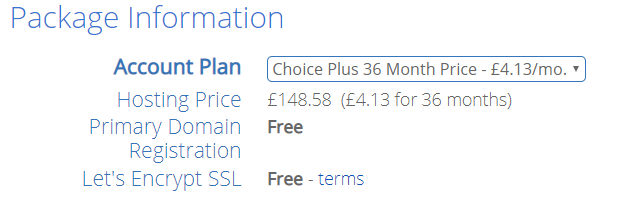
Before proceeding, check the package extras section for pre-ticked boxes. Unfortunately, some web hosts automatically include extras that you might not want or need.
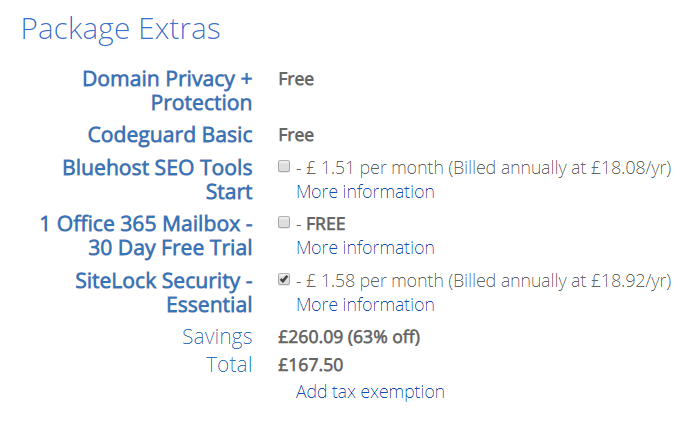
On the Choice Plus plan, domain privacy + protection and Codeguard Basic are already included for free. If you plan on selling products online, it may be worth considering their SEO tools and SiteLock Security extras.
5: Install WordPress with BlueHost
This is the part we’ve all been waiting for! Once you’ve signed up to BlueHost, you can log in to your account. Make sure you’re on the hosting tab at the top, then locate the “Website” section on your control panel.
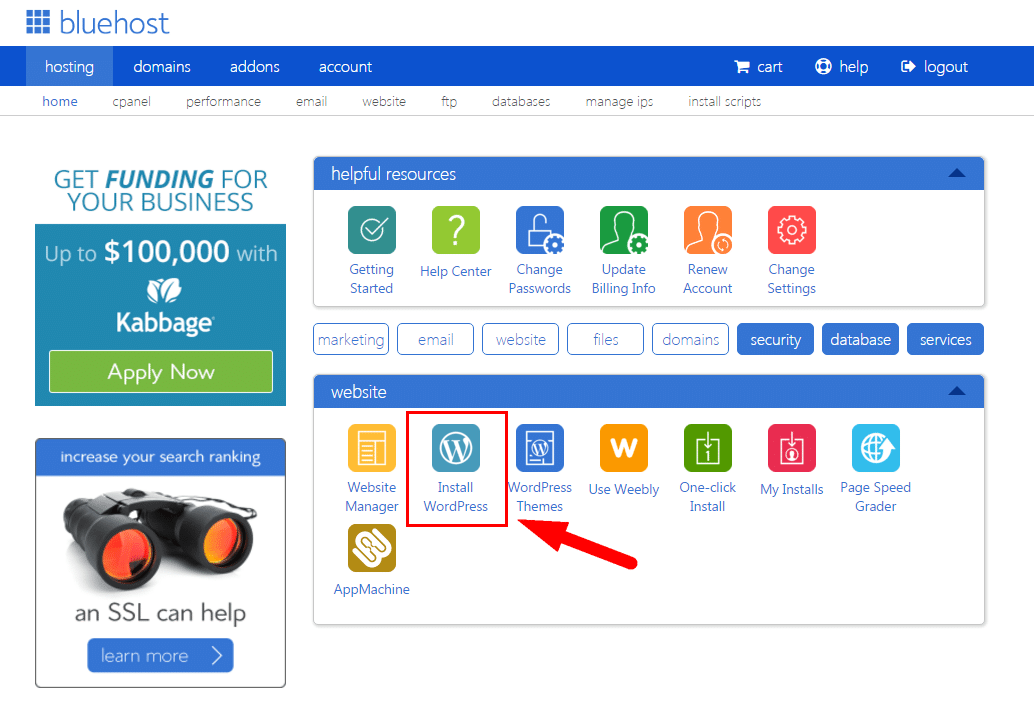
Simply click “Install WordPress”. BlueHost will guide you through installing WordPress which is very easy to do. The process will ask you to confirm a few details and to check that the domain you’d like to install WordPress on is the correct one.
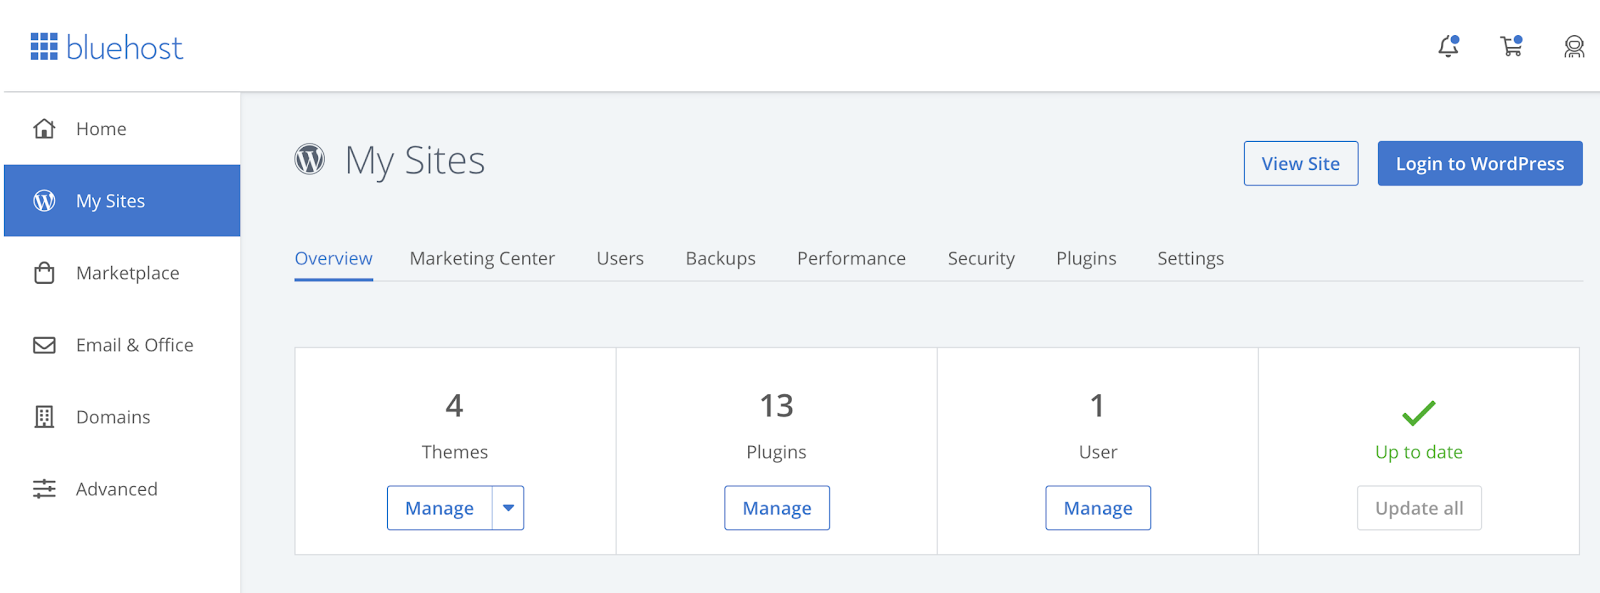
Once WordPress is installed, select “My Sites” from the side navigation menu on the left-hand side. If you have multiple websites, click “Manage Site” to locate the correct one.
Under “Themes”, select “Manage” and you can install a WordPress theme. Remember there are lots of free WordPress themes, as well as premium ones. You can also use themes from third-party websites like ThemeForest.
Log in to WordPress to continue building your WordPress site with BlueHost. If you didn’t select a theme earlier, you can do this at any time using the “Themes” section via WordPress. A default theme will already be installed for you if you haven’t chosen one.
If you plan on selling online, you can connect to WooCommerce. You can also connect to WordPress.com to access extra functionalities and features, by creating an account for free.
Once you’ve finished editing your site, you can go back to the WordPress control panel and click BlueHost. This will allow you to “Launch” your website for the world to access.
6: Overall: Installing WordPress with BlueHost
If you plan on using WordPress and want a great web host to support you, BlueHost is an affordable and convenient option. The 1-click installation option is suitable for beginners and means you can connect your hosting account to WordPress in a few simple steps.
Understanding how to install WordPress with BlueHost should be simple, now you’ve followed our guide. Regardless of whether you’re an expert or beginner, these easy steps should mean the process makes sense, without you incurring any additional costs.
If you’re unsure whether BlueHost is the right web host for you, check out our BlueHost review. You’ll see that they offer superb performance, coupled with awesome features and a great support team.
[/vc_column_text][/vc_column][/vc_row]